

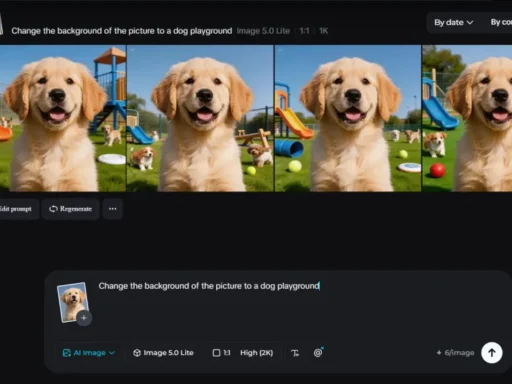
Have you ever shot a beautiful picture only to find out that the background doesn’t really fit the atmosphere? It could have been too busy, too dark, or simply not what you wanted. And that’s where AI comes to play and changes the whole atmosphere with the click of a button.
Using technologies built on the basis of a free AI art generator that allows you to completely change the background of your photo without touching anything in it. The sky is the limit, from creating a professional studio backdrop to giving your picture a surreal outdoor look.
Today, we will look at three unique ways to change photo backgrounds using AI and get impeccable, professional-looking results.
- Create realistic photo backgrounds
If there is one way to drastically improve any photo, it would be to give it a new and completely different background. What about changing the boring indoor environment for the beach background or an office setup?
The trick is that you need to make sure the background looks realistic.
A high-quality background replacement must:
- Match the lighting angle of the subject
- Integrate shadows seamlessly
- Have matching perspective and depth
The AI tool will perform all these checks, ensuring that the replacement is seamless and natural. For example, try to insert an ordinary portrait photograph into:
- The soft interior of a cafe
- The bright garden outdoors
- The minimalistic studio space
As a result, you get a professionally-taken photograph instead of a post-processed one.
- Create stylized and artistic backgrounds
Not always is realism what we need. On the contrary, sometimes we may need something unusual and artistic.
That is where stylized backgrounds become handy. Instead of replicating real-life backgrounds, you may create:
- Abstract gradients
- Neon backgrounds
- Fantasy backgrounds
- Artistic backgrounds
With the help of Dreamina’s AI avatar generator, you can produce different types of avatars that go with your background designs. It will convert your photo into a cohesive piece of work. Such a technique may prove helpful when posting photos online or designing posters or branded visuals.
It would be perfect because no particular skills are required – just tell AI what kind of design you need.
- Design clean and branded backgrounds
When it comes to professional purposes, it always pays off to be simple. Neutral and minimalistic backgrounds will ensure that your subject remains central while adding to the overall sophistication.
This will be great for:
- Profiles and headshots
- Product images
- Visuals for marketing campaigns
There are multiple options for background creation, like:
- Gradient solid colors
- Light texture backgrounds
- Lighting effects
In terms of branding, an AI logo generator could be used in tandem to ensure consistency within the brand visuals.
Why switching backgrounds is more important than you think
Your image background is much more than a setting. It establishes the mood of your image.
Replacing it is essential when:
- You want your image to look more professional
- You would like to add more creativity
- You want to connect your image with a particular theme
Background replacement is one of the fastest ways to improve your images without completely starting from scratch.
Make amazing background transformations with Dreamina
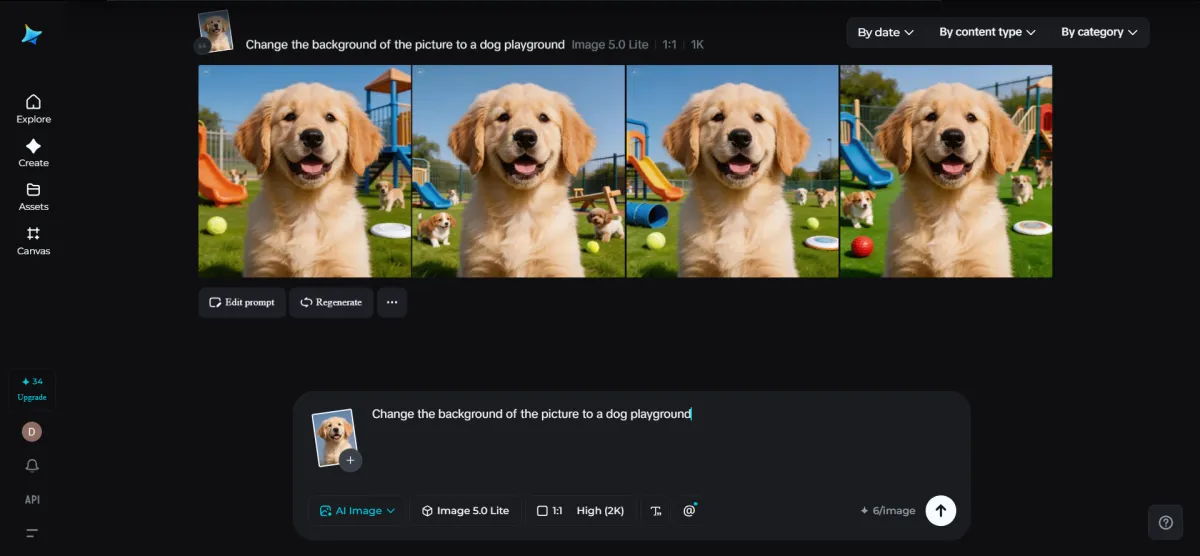
Dreamina will make the background edit easy by allowing you to simply describe your image background and let Dreamina do its magic.
Step 1: Text prompt creation
Go to Dreamina and start writing an elaborate text prompt specifying both your subject and new background. Make sure your prompt contains enough details for the AI to understand what you want.
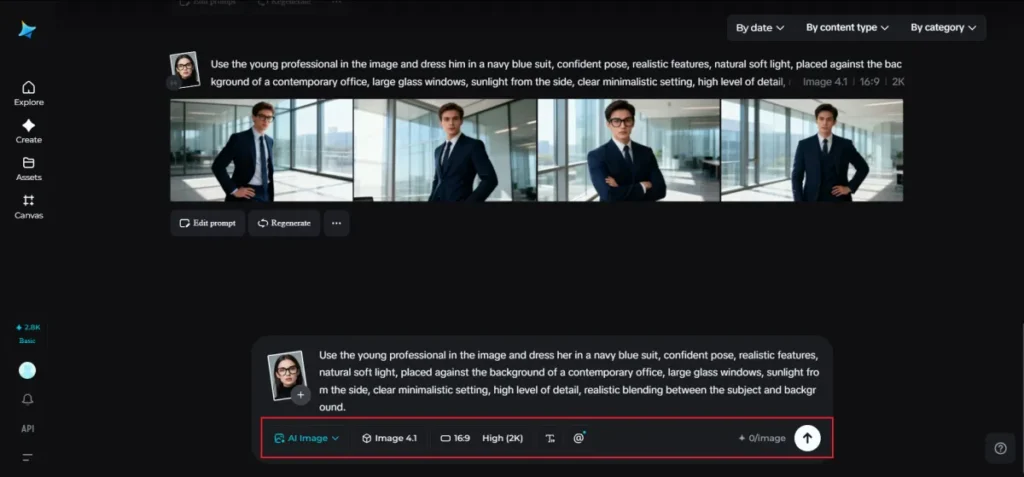
Here is an example to inspire you: Use the young professional in the image and dress her in a navy blue suit, confident pose, realistic features, natural soft light, placed against the background of a contemporary office, large glass windows, sunlight from the side, clear, minimalistic setting, high level of detail, and realistic blending between the subject and background.
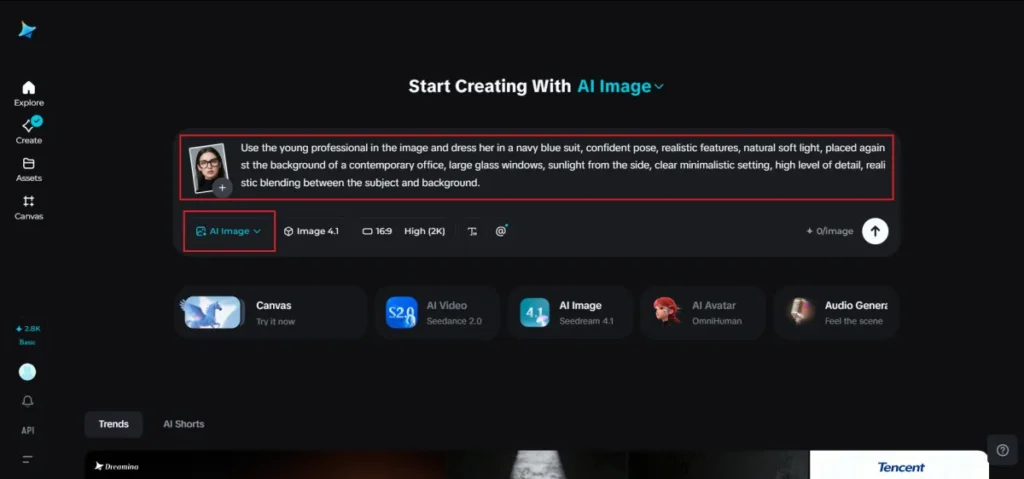
Step 2: Parameter selection and generation
Once you have written a prompt, pick a suitable model for visual generation. Select one of the available ratios – either portrait for headshots or square for social media images. Define the size and resolution of the output image – 1k or 2k. Next, press the Dreamina icon and generate your image.
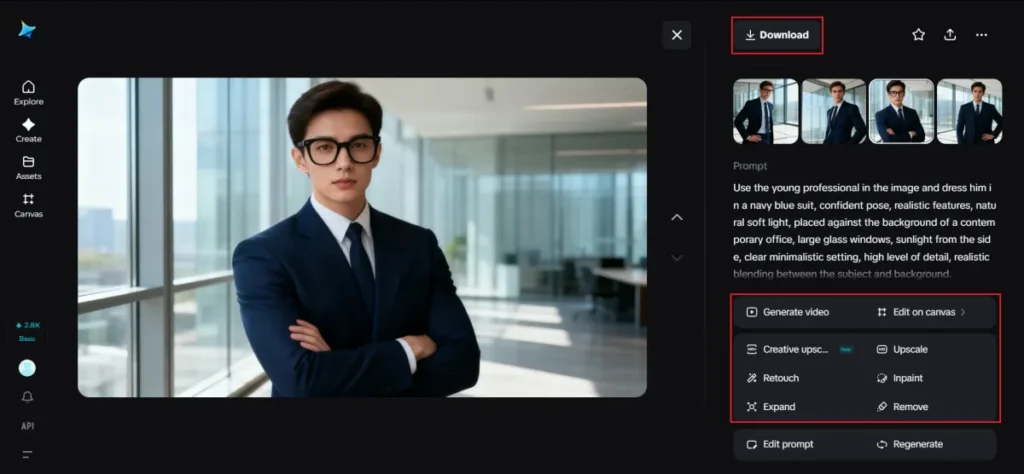
Step 3: Editing and downloading
Now that you have generated your image, use editing options provided by Dreamina. The inpaint option will allow you to make changes to particular regions, expand will help you extend the setting, remove is great for eliminating unwanted objects, and retouch will improve blending and details. Once finished, click the Download icon.
Small details to pay attention to
Even when using AI, paying attention to some small details will help you raise the quality of your results.
Some details worth considering include:
- Consistency of shadows on the subject and background
- Color scheme across the whole picture
- Balance between sharpness and resolution
By adjusting those parameters, you will achieve more realistic effects.
Creative combinations to work with
After becoming familiar with background change techniques, you can try combinations that will require you to use more imagination.
Consider working with:
- Realistic objects combined with surreal backgrounds
- Seasonal versions of the same picture
- Thematically designed visuals related to particular events/campaigns
By combining various elements, you will be able to make your visuals unique and interesting.
How background edits translate into videos
Changing the background does not mean restricting yourself to editing photos only. You can try creating video visualizations based on those pictures and using an AI video generator.
With a video generator tool, you will be able to make videos using prompt texts or images. In such cases, you can generate a scene featuring a certain object or person in the desired location.
It’s a great way to visualize your ideas through a more engaging medium, without complicated production processes.
While preserving everything in a perfect and natural way
The purpose of background editing lies not only in making transformations, but also in their naturalness.
For this reason:
- Don’t use excessive differences in light
- Maintain a balance of perspectives
- Use gentle editing techniques
Everything is going to look more professional as a result.
Conclusion: recreate your scenes easily using Dreamina
Modifying photo backgrounds used to be quite complicated, requiring great editing knowledge and skills. But thanks to Dreamina, anyone can now modify any image into a professional, realistic, and unique one just by telling how it should look.
It doesn’t matter whether you need a professional or an artistic image – with Dreamina, you can create everything easily. Not just edit backgrounds, but recreate your scenes completely.